Are you ready to transform your WordPress or WooCommerce site into a 24/7 sales and support powerhouse? Manually answering the same questions and guiding users to products can consume valuable time. IntelliAgent AI solves this by deploying an intelligent assistant that learns from your content, recommends products, and converts visitors automatically. This guide provides a complete, step-by-step walkthrough of the IntelliAgent AI setup process, ensuring you can launch your new digital employee in minutes.
Whether you’re running a bustling WooCommerce store or a content-rich WordPress site, this detailed tutorial will help you configure every aspect of the plugin, from initial license activation to advanced AI persona crafting. Let’s get started.
Table of Contents
- The 4-Step IntelliAgent AI Setup Flow
- Step 1: How to Activate Your IntelliAgent AI License
- Step 2: Connecting Your AI Engine (OpenAI, Gemini, or Grok)
- Step 3: Syncing Your Website and WooCommerce Store
- Step 4: Crafting Your Custom AI Persona
- Advanced Customization and Training
- Why You Should Use the FAQ Management Feature
- Frequently Asked Questions
The 4-Step IntelliAgent AI Setup Flow
The core of the IntelliAgent AI setup is a straightforward, four-step process. Following this exact sequence ensures a smooth launch and a properly configured AI agent. The entire process is designed to be completed quickly, even for users without technical experience.
The recommended setup sequence is: License Activation → AI Engine Configuration → Website & Store Sync → AI Persona Creation. Completing these steps in order builds the foundation for your AI’s knowledge and personality before you fine-tune its appearance and behavior.
Step 1: How to Activate Your IntelliAgent AI License
License activation is the first and most crucial step. Authenticating your purchase unlocks all professional features, enables communication with the AI models, and verifies your lifetime ownership of the plugin. Without an active license, the core intelligence engine will not function.
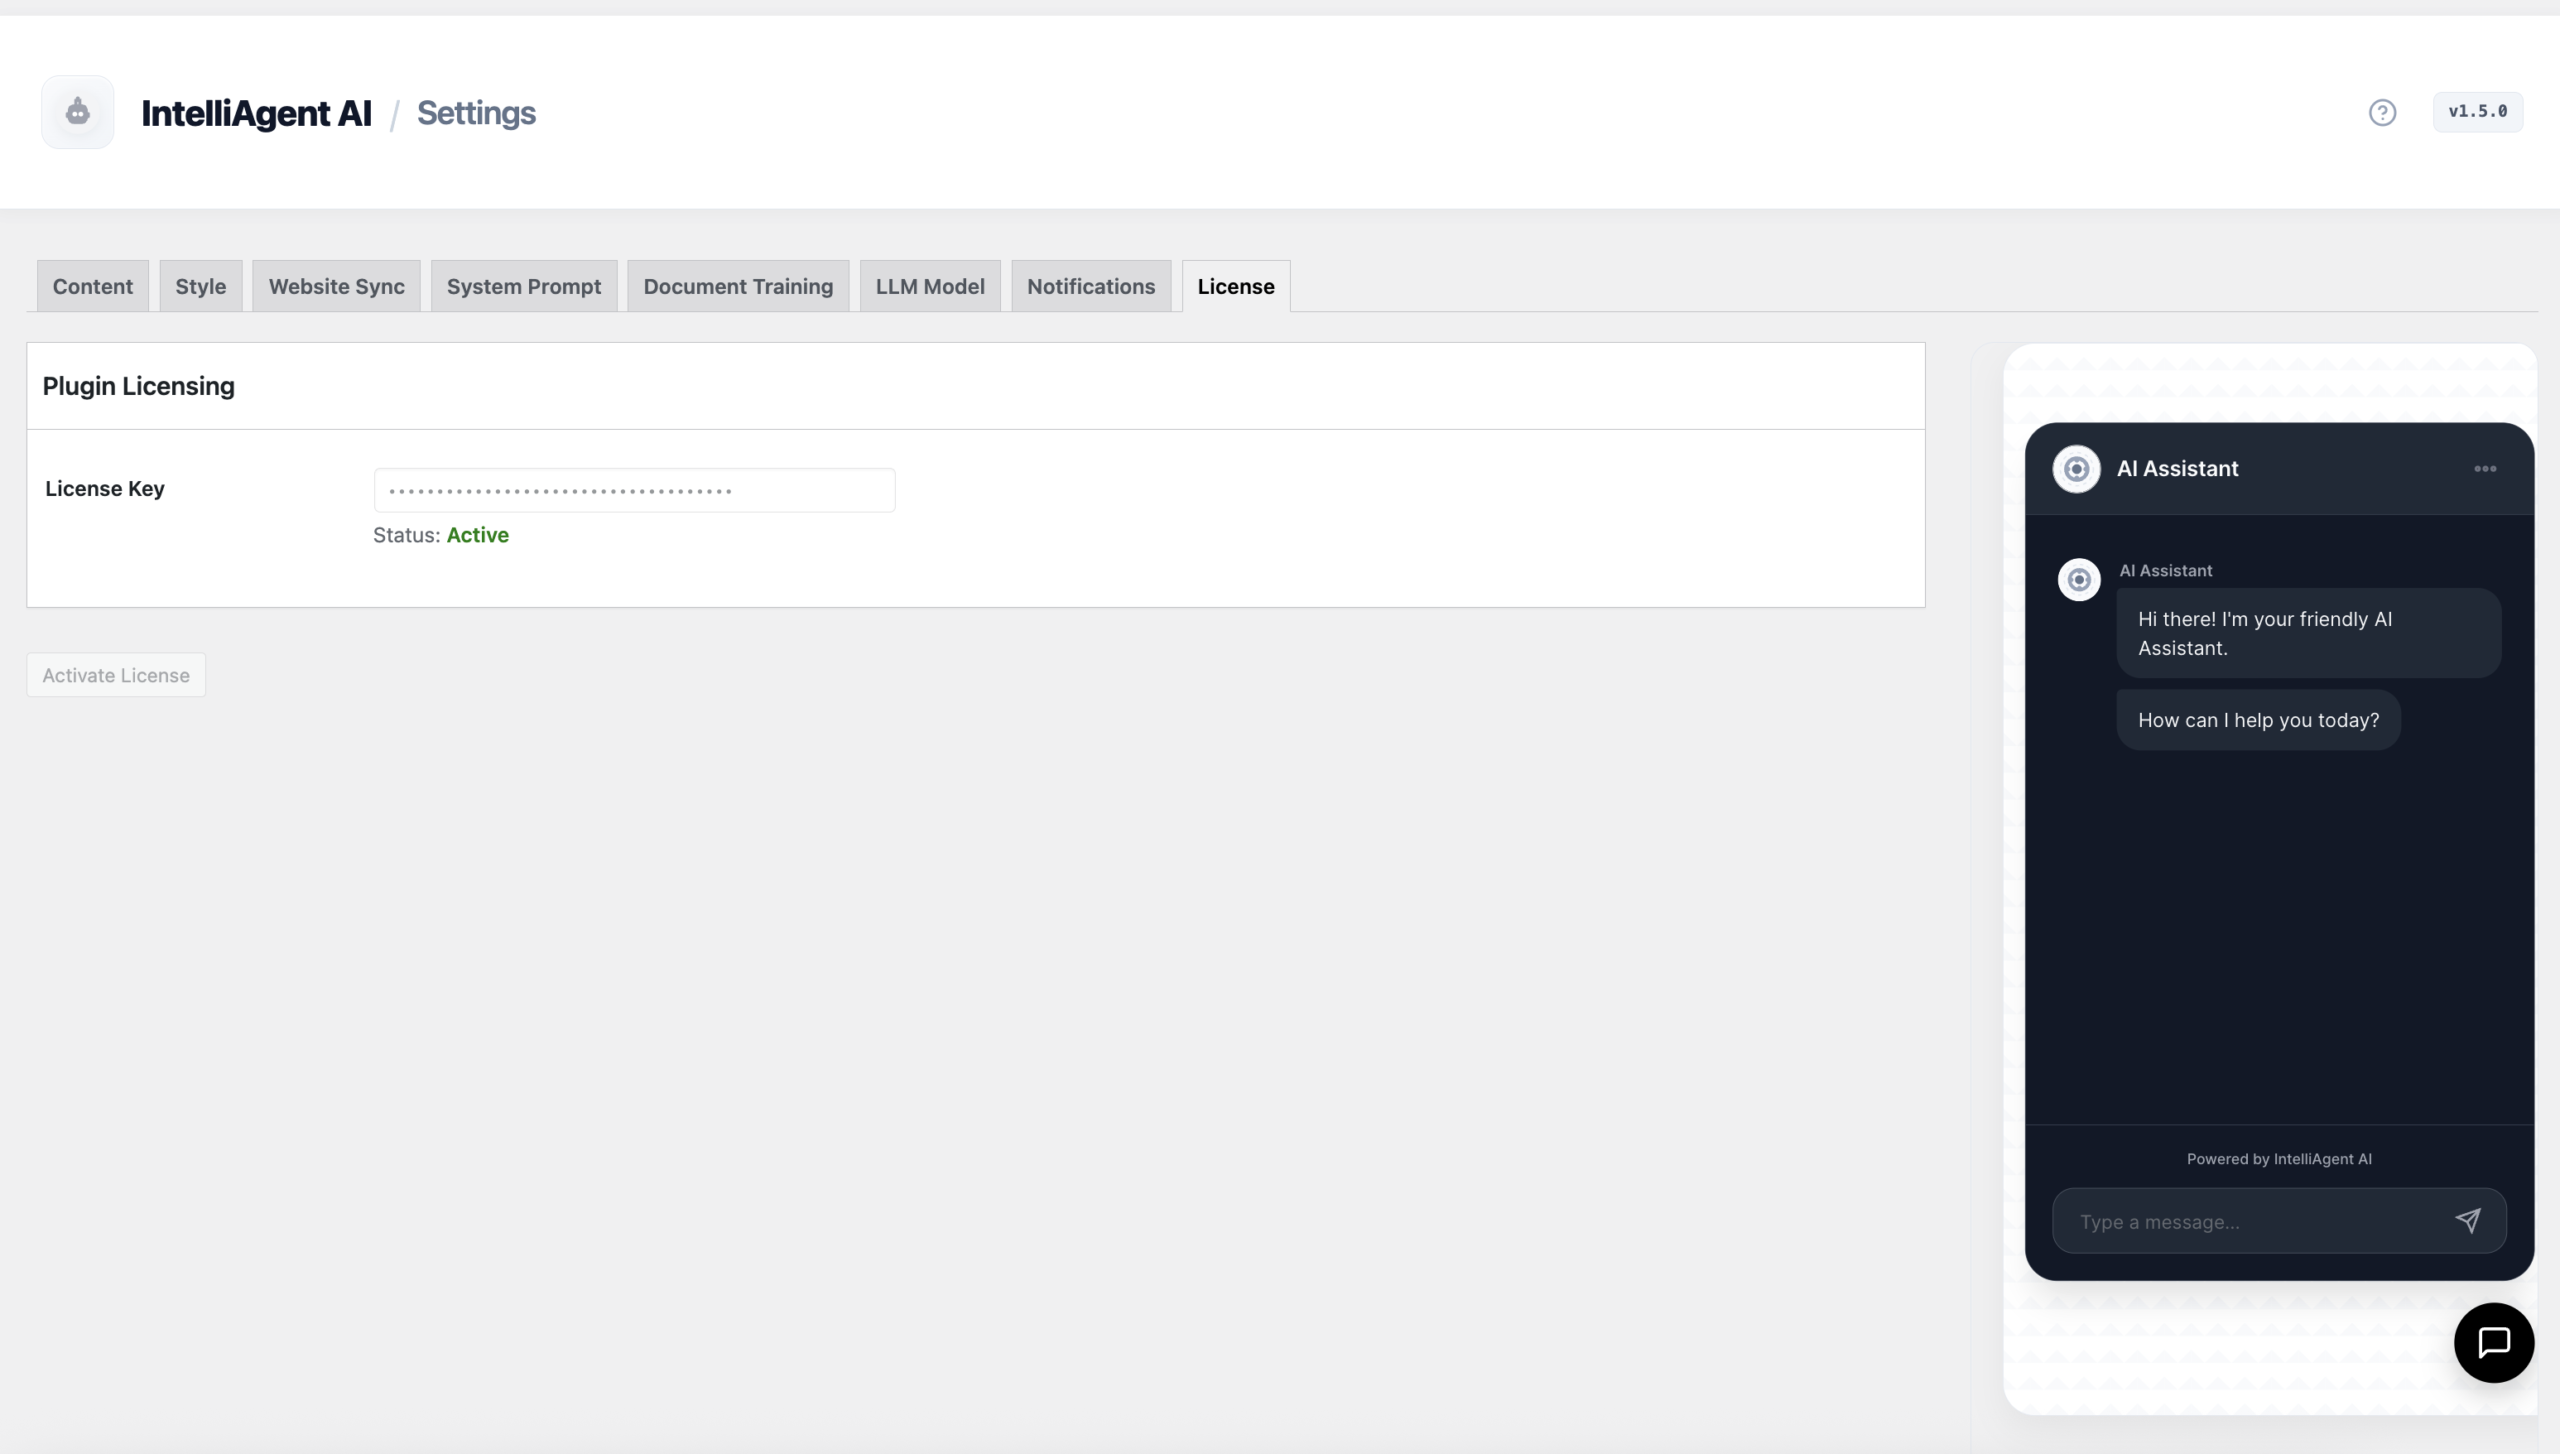
To activate your license, navigate to the IntelliAgent AI → License tab in your WordPress dashboard. Paste the license key you received after purchase into the designated field and click “Activate License.” Upon successful validation, the status will change to “Active,” and all plugin features will be unlocked.
Step 2: Connecting Your AI Engine (OpenAI, Gemini, or Grok)
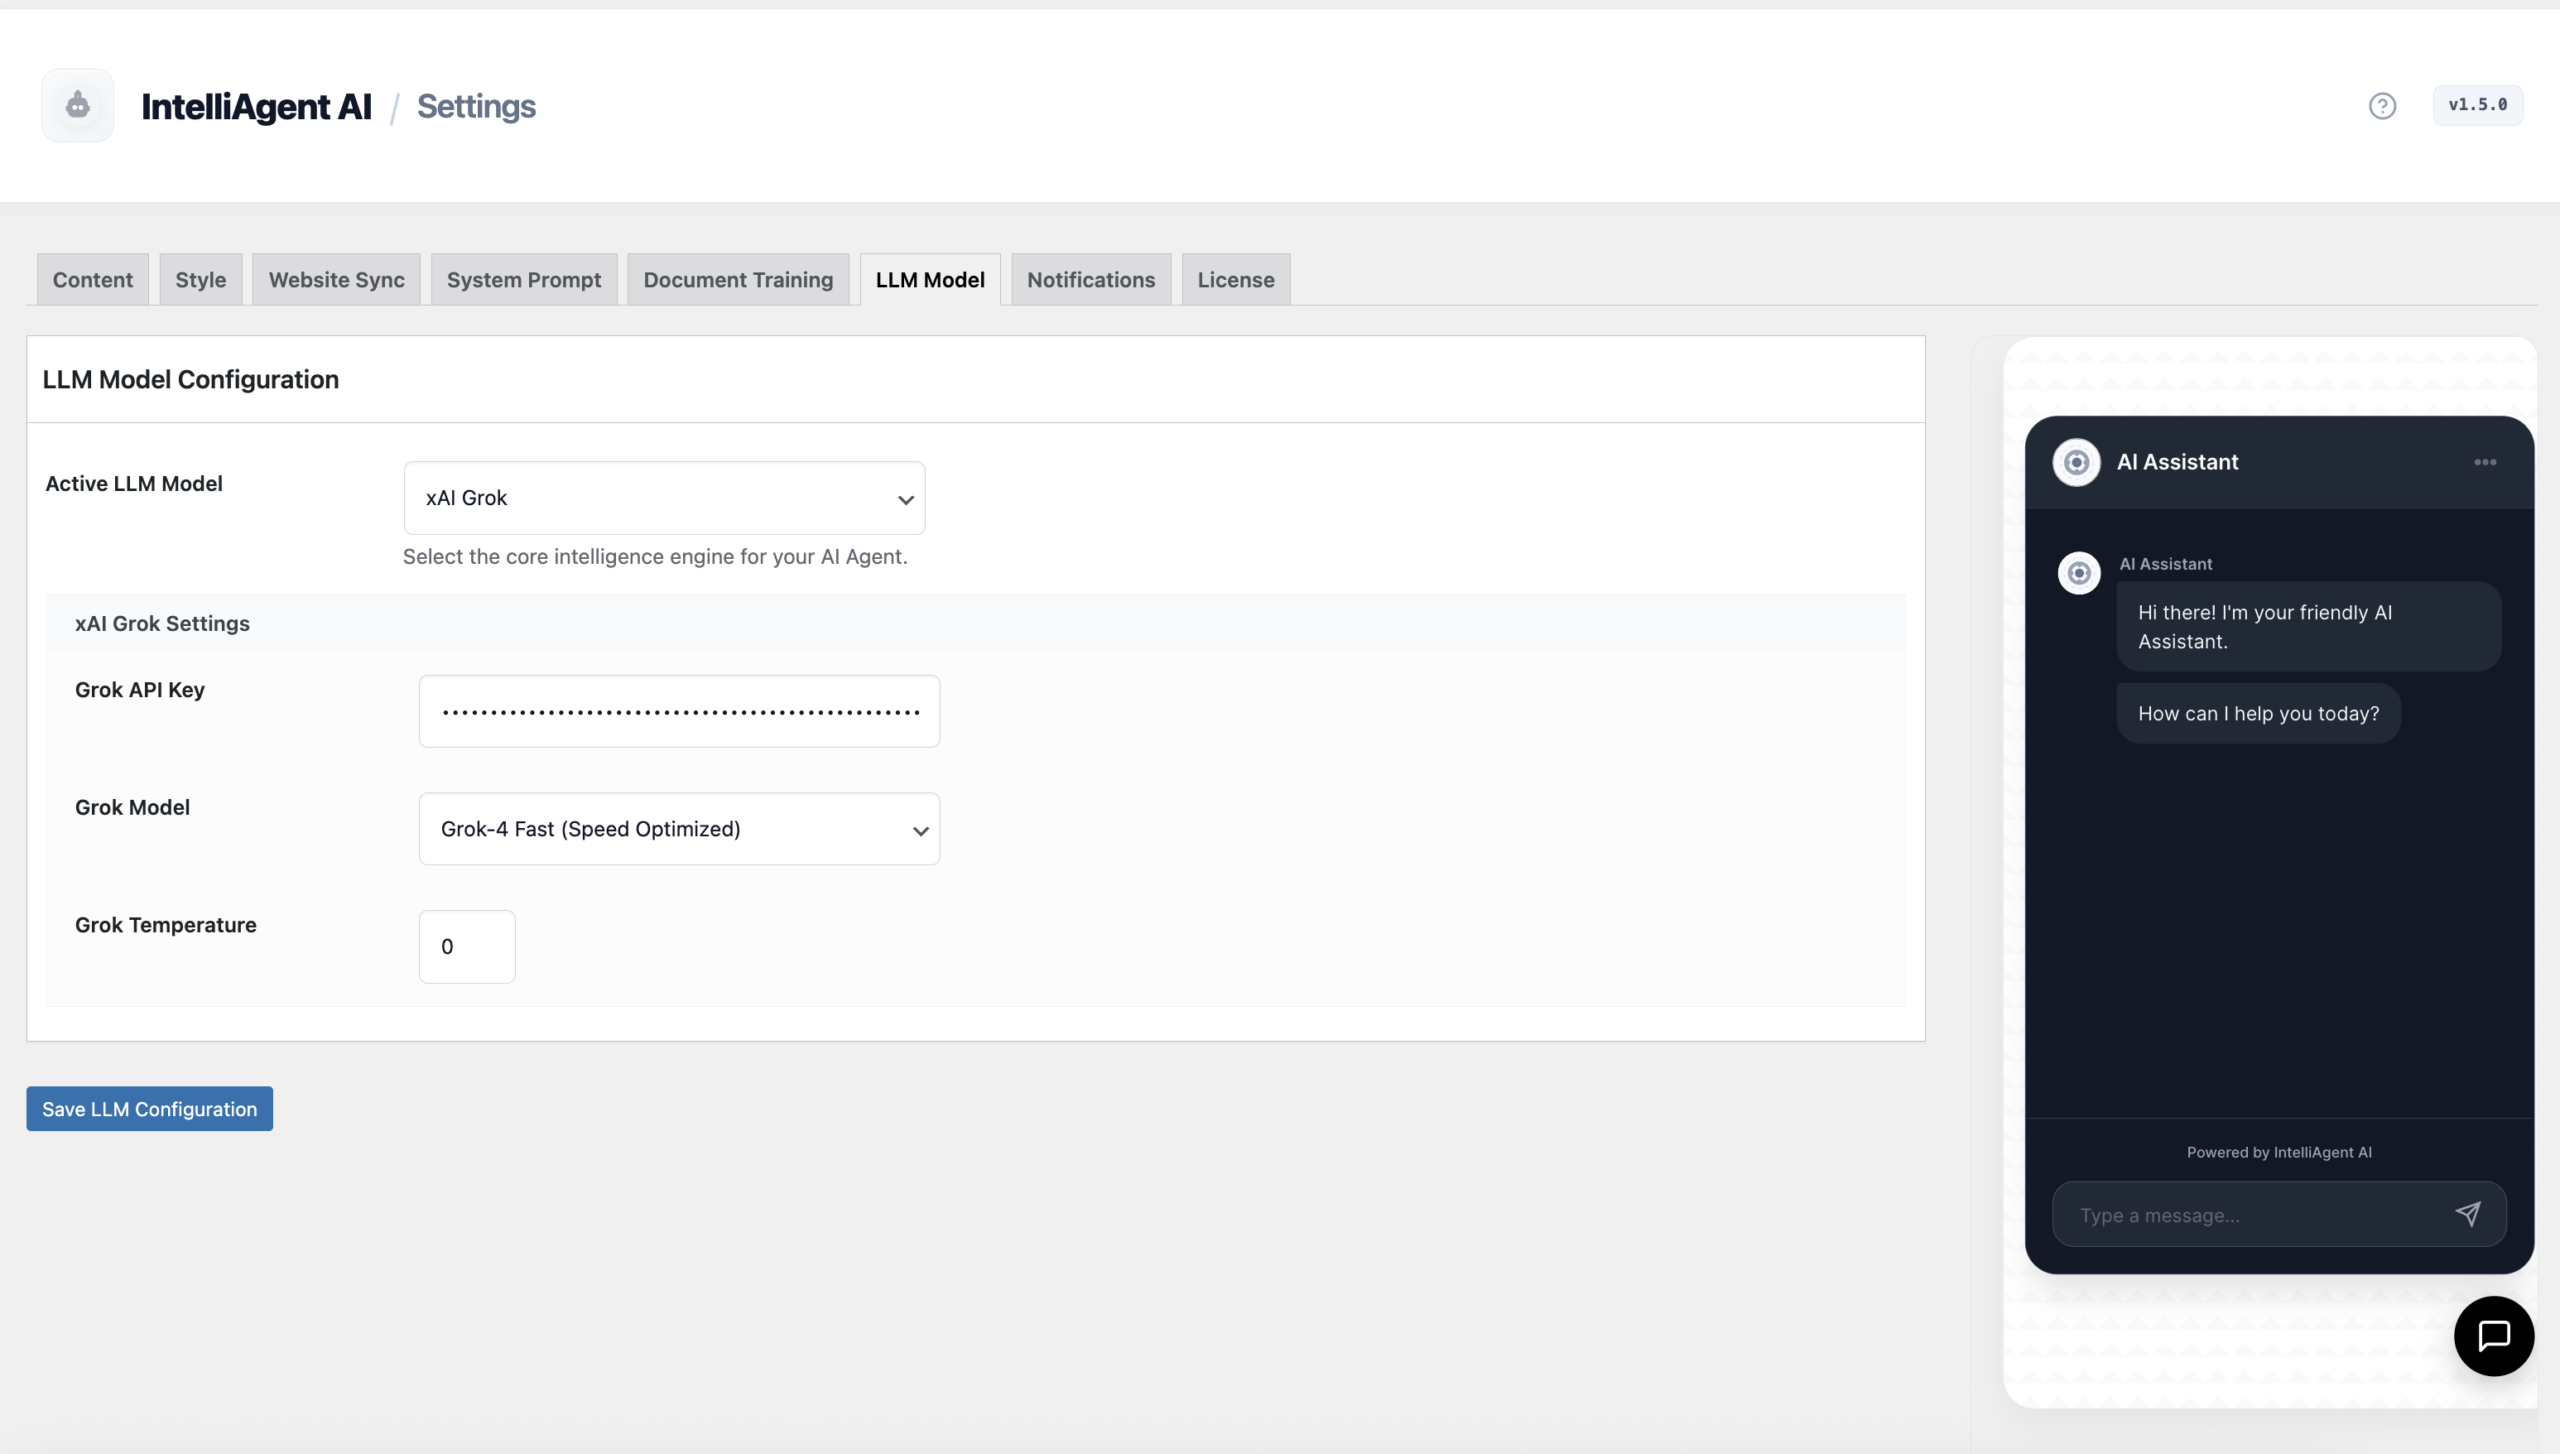
The AI Engine is the brain of your chatbot. IntelliAgent AI provides the flexibility to connect with several of the world’s most powerful large language models (LLMs), including those from OpenAI, Google (Gemini), and Grok. This multi-model support creates a future-proof infrastructure, allowing you to switch providers based on cost, performance, or specific feature needs.
In the AI Engine tab, select your preferred provider and enter your corresponding API key. This key securely connects your website to the AI model, enabling the real-time conversational reasoning required to answer questions and assist customers. Version 1.6 supports the latest flagship models, which are essential for advanced sales logic and accurate product recommendations.
Choosing Your AI Engine
Selecting the right AI provider is a key part of the IntelliAgent AI setup. Here is a quick comparison to help you decide:
| AI Engine | Best For | Key Consideration |
|---|---|---|
| OpenAI (GPT Models) | A reliable, industry-standard balance of high performance, strong reasoning, and predictable costs. Ideal for most users. | Requires an OpenAI account with billing set up. The most widely used and well-documented option. |
| Google Gemini | Businesses looking for cutting-edge multimodal capabilities and deep integration with the Google ecosystem. | Can offer competitive performance and pricing, but API availability and features may vary. |
| Grok | Users seeking a unique conversational style and access to real-time information for more dynamic interactions. | A newer model with a distinct personality. Ensure its conversational tone aligns with your brand voice. |
Step 3: Syncing Your Website and WooCommerce Store
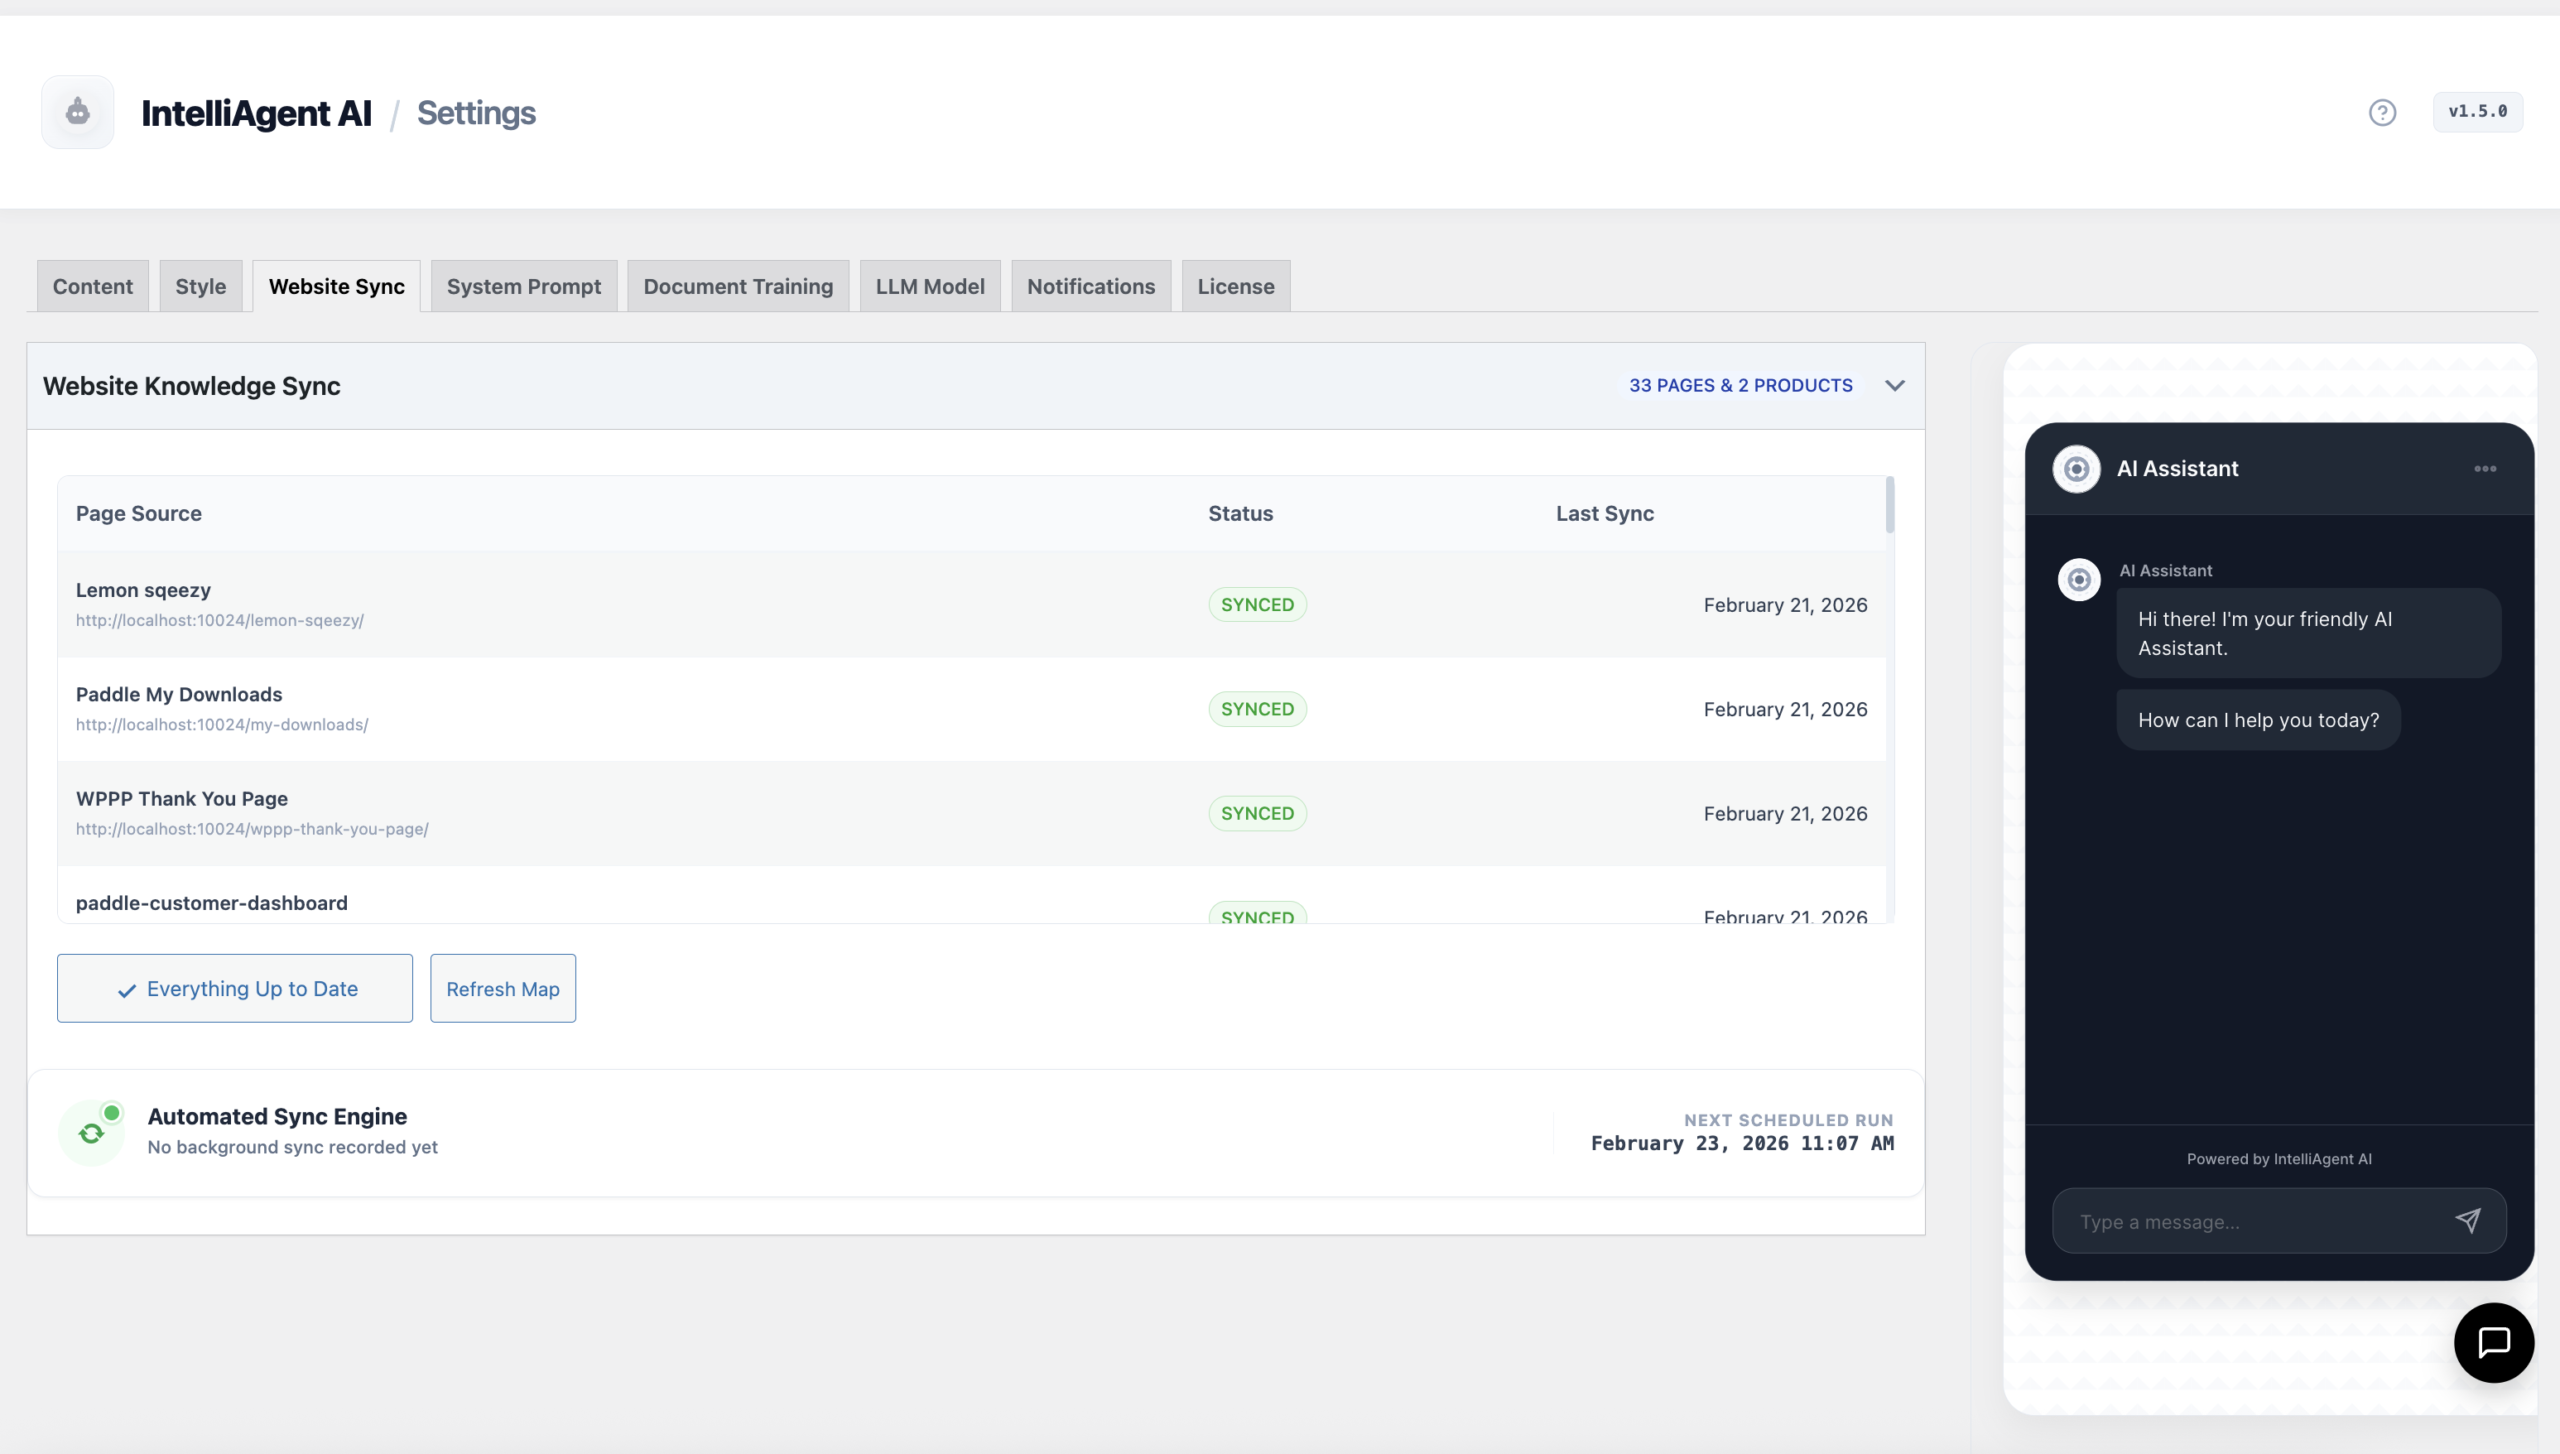
An AI agent is only as smart as the information it can access. The Website Sync feature is the heart of your AI’s knowledge base. This powerful tool automatically scans your entire WordPress site—including pages, blog posts, and WooCommerce products—to build a private, comprehensive understanding of your business.
This initial sync is critical for enabling the AI to provide accurate answers and relevant product recommendations. For WooCommerce stores, this step is what turns the chatbot into a sales-ready assistant capable of helping with order tracking and add-to-cart actions. The system uses WP-Cron to schedule automatic daily syncs, ensuring your AI’s knowledge base always reflects your current site content and product inventory.
Expert Insight: Before running your first sync, ensure all important pages (like Shipping Policy, About Us, and Contact) are published and not set to ‘draft’. The AI can only learn from content it can access. A well-structured website with clear information will result in a significantly more effective AI assistant.
Step 4: Crafting Your Custom AI Persona
How should your AI assistant sound? Should it be professional and direct, or friendly and conversational? The AI Persona tab allows you to define the personality, tone, and instructions that guide your AI’s behavior. This step is crucial for ensuring the chatbot aligns with your brand voice.
For a quick and effective start, use the “Auto-Generate from Website Content” button. This feature analyzes your newly synced content to draft a custom persona that understands your product line and communication style. You can then refine these instructions to fine-tune how the AI sells products, handles support queries, and interacts with visitors.
What to Avoid: The Generic Persona Pitfall
A common mistake is leaving the AI persona with generic instructions like “Be a helpful assistant.” This results in a robotic, unengaging experience. Take a few minutes to provide specific context. For example: “You are a friendly and expert sales assistant for [Your Brand Name], specializing in [Your Products]. Your goal is to help users find the perfect product and guide them to purchase.” This small change dramatically improves the quality of interactions.
Advanced Customization and Training
Once the core IntelliAgent AI setup is complete, you can explore the advanced settings to fully tailor the experience. These features allow you to enhance the AI’s knowledge and match its appearance to your brand identity.
Visual Appearance
Navigate to the Visual Appearance tab to customize the look and feel of the chat interface. With a live preview sidebar, you can see changes instantly. Key options include:
- Theme Modes: Choose between a pre-built Light and Dark mode.
- Branding: Upload a custom avatar for your AI and set a primary brand color for chat bubbles and icons.
- Localization: Change customer-facing text like the agent’s display name and the initial placeholder message in the chat box.
- Language Support: Serve a global audience with support for over 40 languages, eliminating the need for extra translation plugins.
Document Training
Sometimes, crucial information isn’t on a public webpage. The Document Training feature allows you to upload files like PDFs, TXT documents, or even images directly into the AI’s knowledge base. This is perfect for training the AI on product manuals, detailed technical specifications, or internal return policies, ensuring it can answer highly specific questions with precision.
Feedback & AI Training
Treat your AI like a new employee. The Feedback & AI Training dashboard lets you review real visitor conversations. If you find an unhelpful or incorrect response, you can provide the ideal answer. This feedback trains the model, improving its accuracy and effectiveness over time, especially for capturing future sales opportunities.
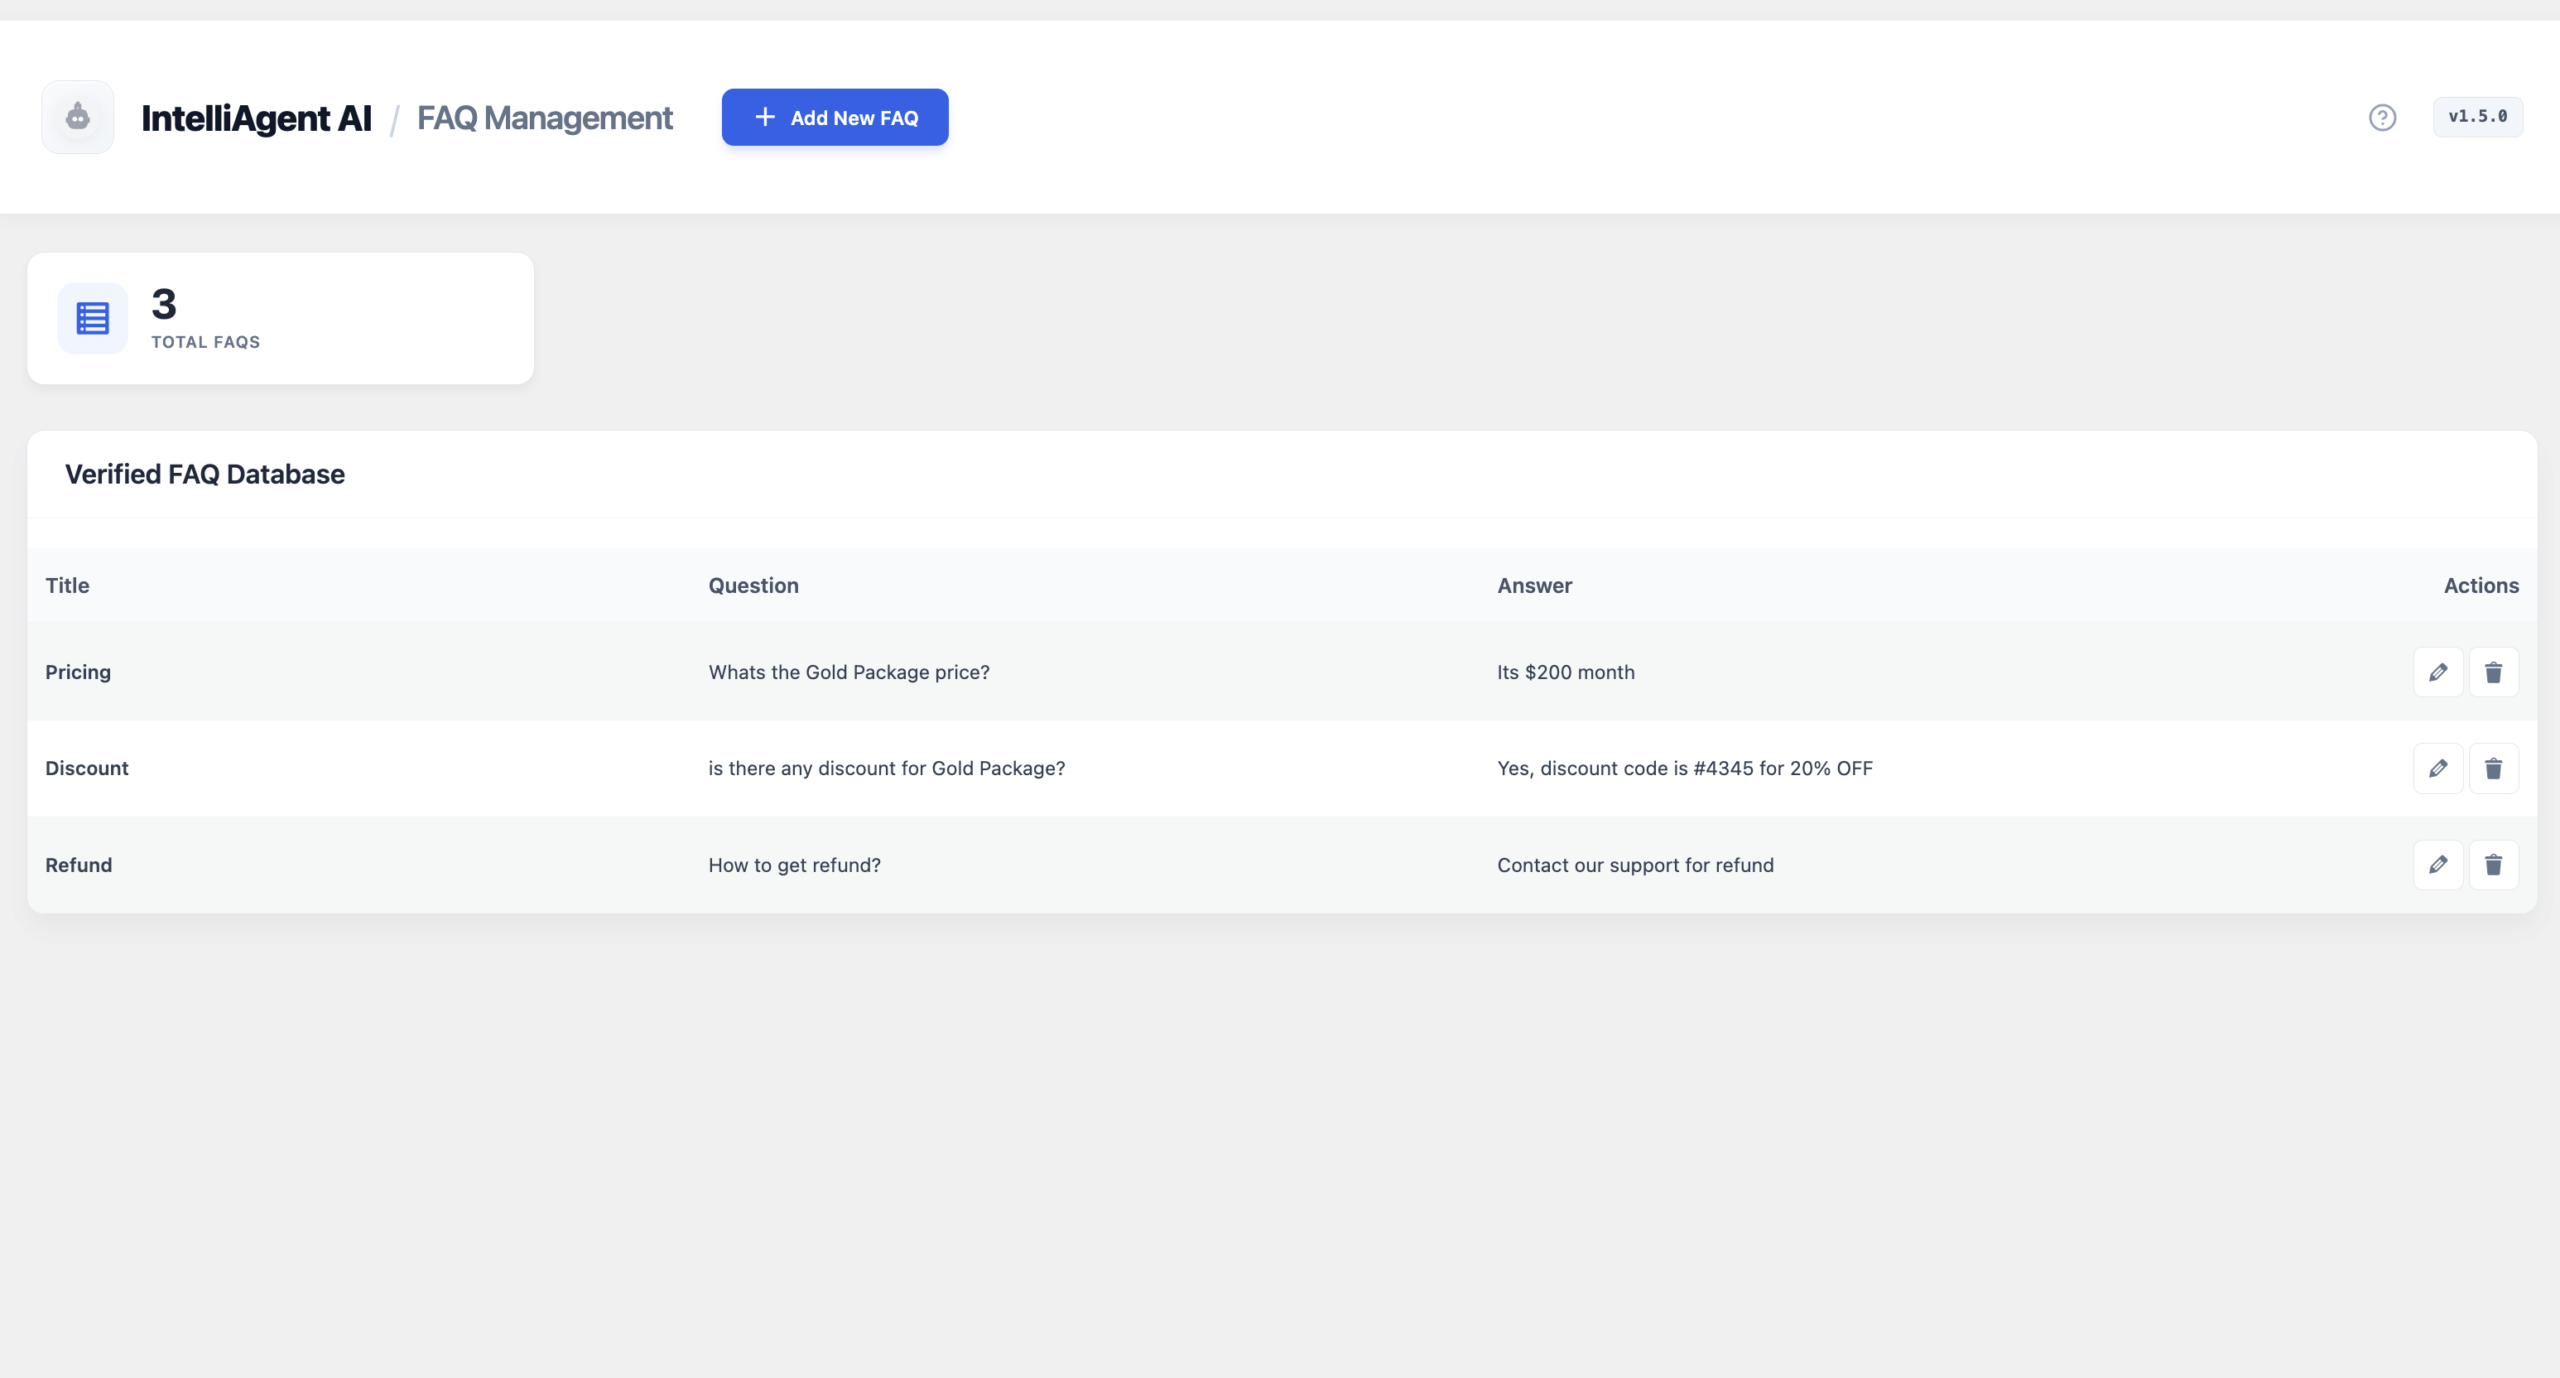
Why You Should Use the FAQ Management Feature
While website sync provides broad knowledge, the FAQ Management system offers surgical precision. This feature allows you to create a verified database of answers to your most critical questions, such as those related to shipping, refunds, store policies, or key product specs.
The AI prioritizes information from this verified FAQ database above all other content. This ensures 100% accuracy on non-negotiable business information, building customer trust and preventing the AI from making incorrect statements about your policies. Taking the time to populate this section is one of the most effective ways to create a reliable and trustworthy AI support agent.
Frequently Asked Questions
How long does it take to complete the IntelliAgent AI setup?
For a basic setup following the core 4 steps (License, AI Engine, Sync, Persona), you can have a functional AI agent running on your site in under 15 minutes. Advanced customization and training will take additional time based on your specific needs.
Do I need to be a developer to install this plugin?
No, IntelliAgent AI is designed for beginners. The entire setup process is managed through the WordPress dashboard with a user-friendly interface. No coding is required to install, configure, or launch your AI agent.
Which AI Engine should I choose: OpenAI, Gemini, or Grok?
The choice depends on your budget and performance needs. OpenAI’s GPT models are a reliable industry standard. Gemini offers powerful reasoning from Google. Grok provides a unique conversational style. We recommend starting with OpenAI for its excellent balance of cost and performance unless you have a specific preference.
Will IntelliAgent AI slow down my website?
No, the plugin is optimized for performance. The intensive AI processing happens on the provider’s servers (like OpenAI), not your own. The website sync runs efficiently in the background using WP-Cron, ensuring minimal impact on your site’s speed and user experience.
By following this guide, you have successfully completed the IntelliAgent AI setup and launched a powerful digital employee on your website. This assistant will now work around the clock to engage visitors, answer questions, and drive sales, freeing you to focus on growing your business.
Ready to stop losing leads and start automating your customer engagement? Turn your WordPress site into an intelligent sales and support engine today with a one-time payment for lifetime ownership. Get IntelliAgent AI now and unlock the power of 24/7 AI automation.